Rip Guild Wars 2 character and 3D print
Created: 2024-08-07
- Rip'n'print
- Ripping GW2 with Ninja Ripper
- Import into blender
- Going back to Blender...
- Recalculating normals
- Fixing areas without thickness
- Adding thickness to the cape.
- Adding thickness to the beard
- Going back to slicing
- 3D print results!
Rip'n'print
Ripping 3D models from games can be done by injecting a dynamic loaded library (.DLL) when running the game executable "jacking" into the graphics calls (OpenGL, DirectX etc). The ripper then usually store the game meshes and texture on the disk.
The intention of this post is to act as a reference for those who wants to rip their own Guild Wars 2 (GW2) character to be printed. It might also be an interesting showcase of what is possible in the realm of DIY projects and your favourite 3D game. The method described below probably also works for other games, but the method of ripping and the quality of the resulting meshes vary between games and ripping applications. Also, games tend to use various tricks to render their characters in a visually appealing way that does not necessarily translate well to a 3D print. MMORPGs, for example, tend to have weapons that float mid air next to the character which is not ideal for printing. GW2 is an example where some of the game's weapons are mostly shaders where the weapon model on its own is 1) not that interesting and 2) next to impossible to print. Before you try ripping models, you need to make sure that you game allows it. Online games tend to not allow its users to inject stuff into the game runtime. GW2's stance is... well complicated. I would say, be smart and use ripping at your own risk. Always make sure to read up on forums before you let it rip. If you are afraid to get banned, only rip offline games.
In this post I will rip 3D models from the MMORPG game Guild Wars 2 using Ninja Ripper, then cleanup and prepare my character mesh in Blender, to finally slice the model in Prusa Slicer and
3D print it.
Application versions:
- Ninja Ripper 2.5
- Blender 4.1
- Prusa Slicer 2.8.0
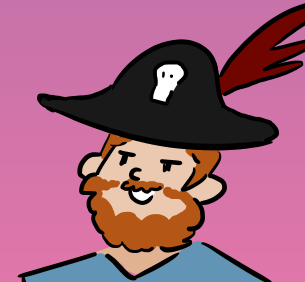
Practically, this means that in-game you press a hotkey and the ripping application effectively turn this scene: 
into a lot of meshes and textures that can be imported and rendered in Blender: 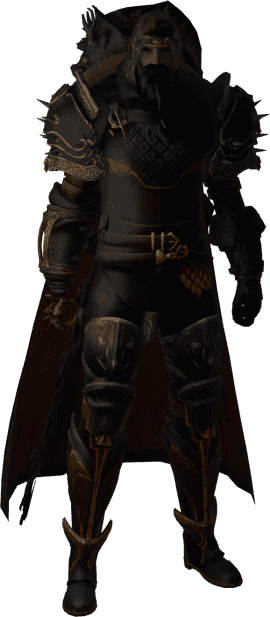
Ripping GW2 with Ninja Ripper
Ninja Ripper is an ripper application that includes a wrapper that injects into to your game of choice, where you then can extract the contents of the currently rendered frame.
-
Move the wrapper (default installation path:
C:\Program Files (x86)\Ninja Ripper 2.5\bin64\wrappers\d3d11.dll) into the Guild Wars 2 installation folder (same folder as Gw2-64.exe)C:\Program Files\Guild Wars 2. If there already is a DLL there for another game addon e.g. arcdps, which is a common addon for tracking damage output, there is a way of chaining injects by using multiple DLLs. Before moving the Ninja ripper DLL (dxd11.dll) into the folder, rename the other addondxd11.dlltodxgi.dll. It doesn't matter what library is named what, both DLLs are loaded by the.exewhen starting GW2 normally. -
To capture meshes from a frame, use the frame rip key in Ninja Ripper.
 Note that this will take some time... about 3 minutes for me.
 -
Now the folder Ninja Ripper output folder (default
C:\Users\<USERNAME>\AppData\Roaming\Ninja Ripper\) should contain textures and meshes from the scene. For me these files were namedmesh_1.nr,mesh_2.nr... and so on
Import into blender
-
Install the Ninja ripper included addon for importing into blender:
C:\Program Files (x86)\Ninja Ripper 2.5\bin64\importers\io_import_nr.zip. -
To import into Blender, enable the addon and navigate to:
File > Import > Ninja Ripper 2 World Space -
Navigate the viewport to find your character. I don't know if there is an efficient way of doing this but use the viewport camera to pan, zoom, etc to find my character. Like a needle in a haystack...
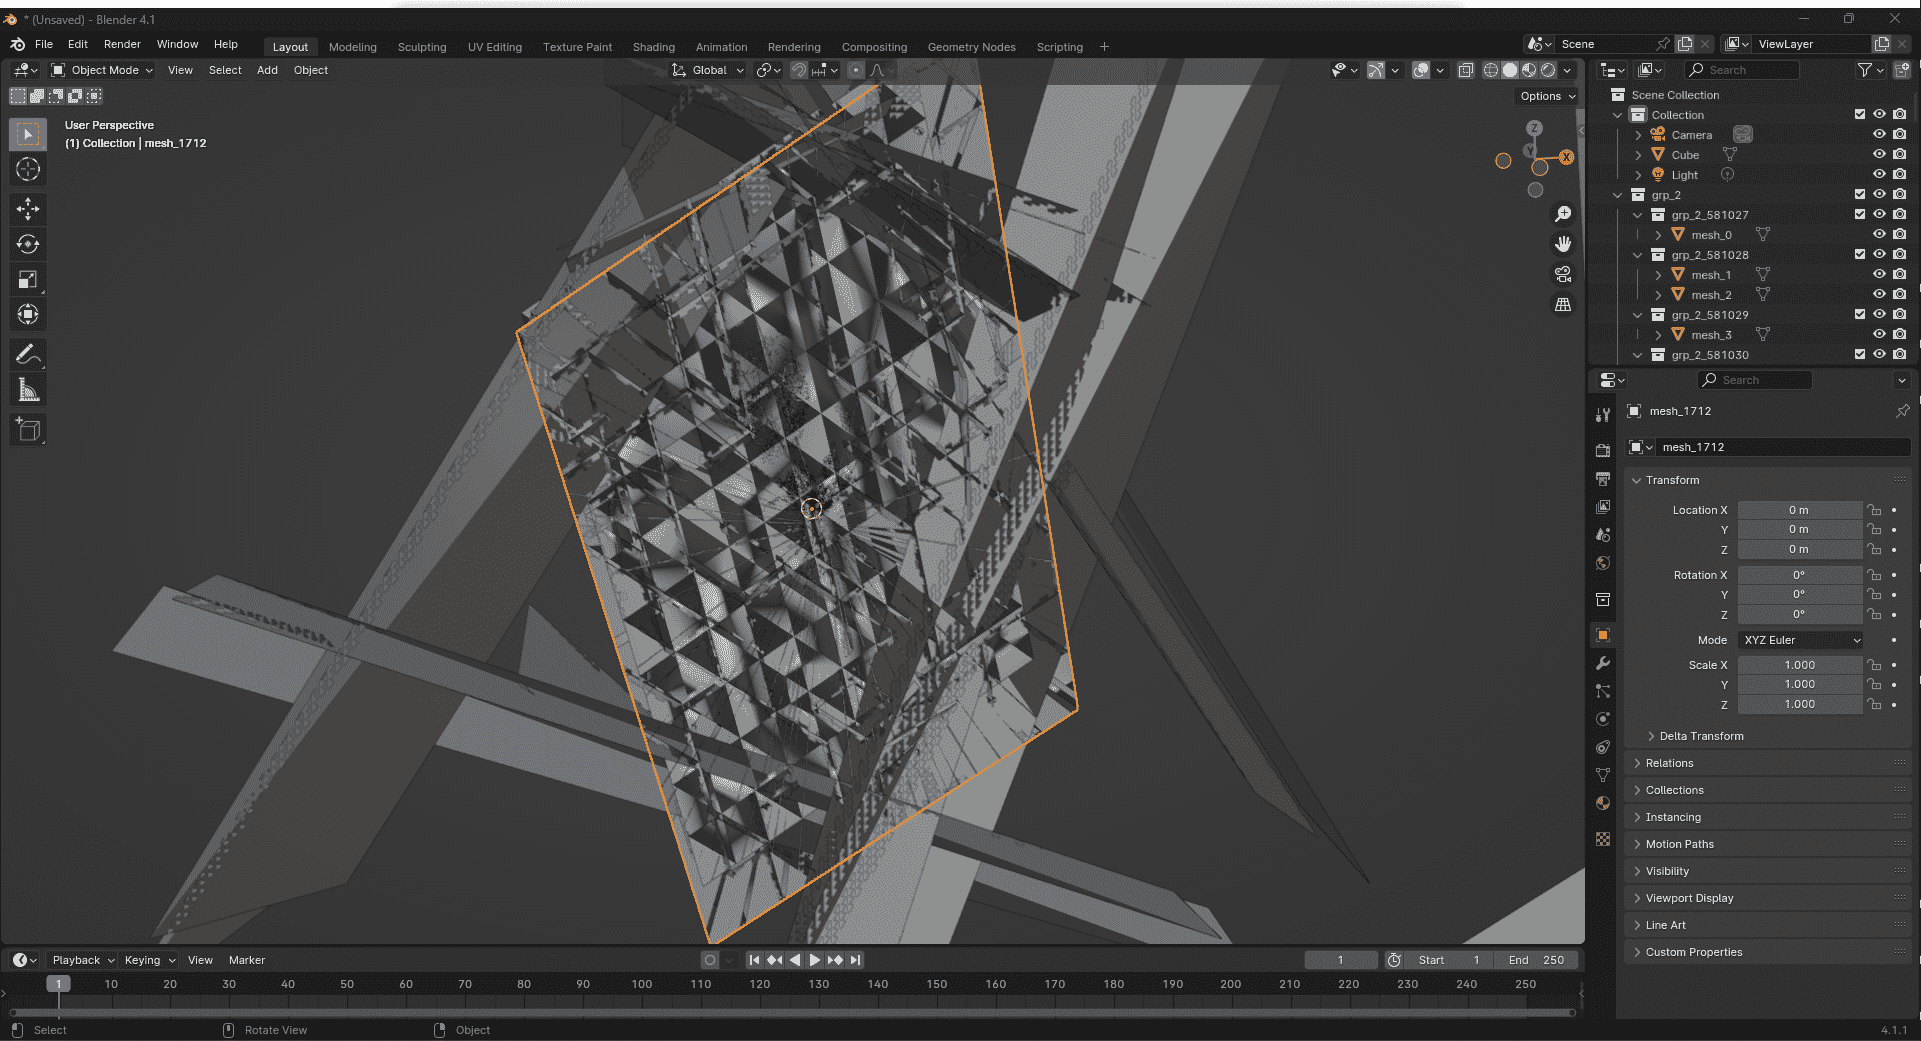
-
Then, select all meshes that are part of your character and copy them to a separate Blender project where it's easier to work with the mess,
Ctrl + CandCtrl + V. Note that textures and normals on the meshes might be correct.. for me all texture except for the head gear were correct. (If you want to render a pretty scene then this needs to be fixed) -
Your slicer application of choice most likely supports slicing STL files which is a format Blender 4.2 officially supports:
Export to STL File > Export > STL.
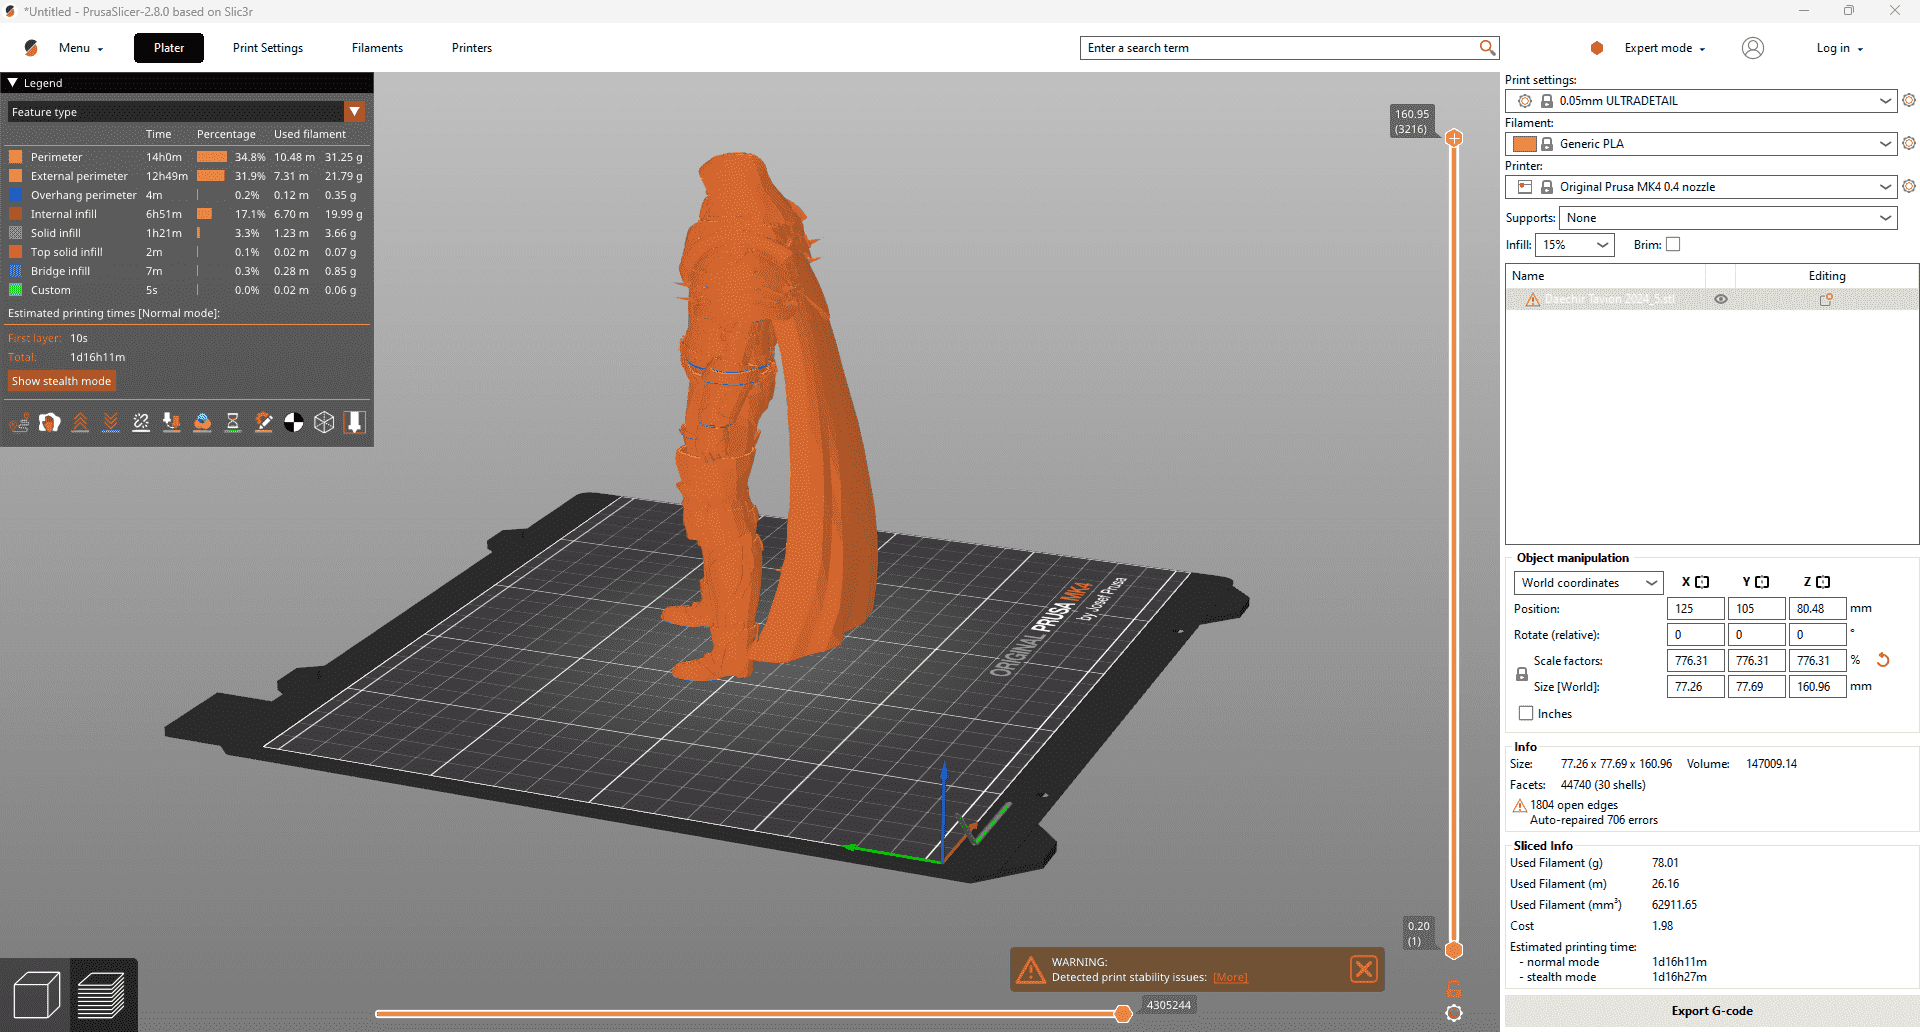
Import the STL into Prusa Slicer and slice it without making any modifications results in this mess of a slice... 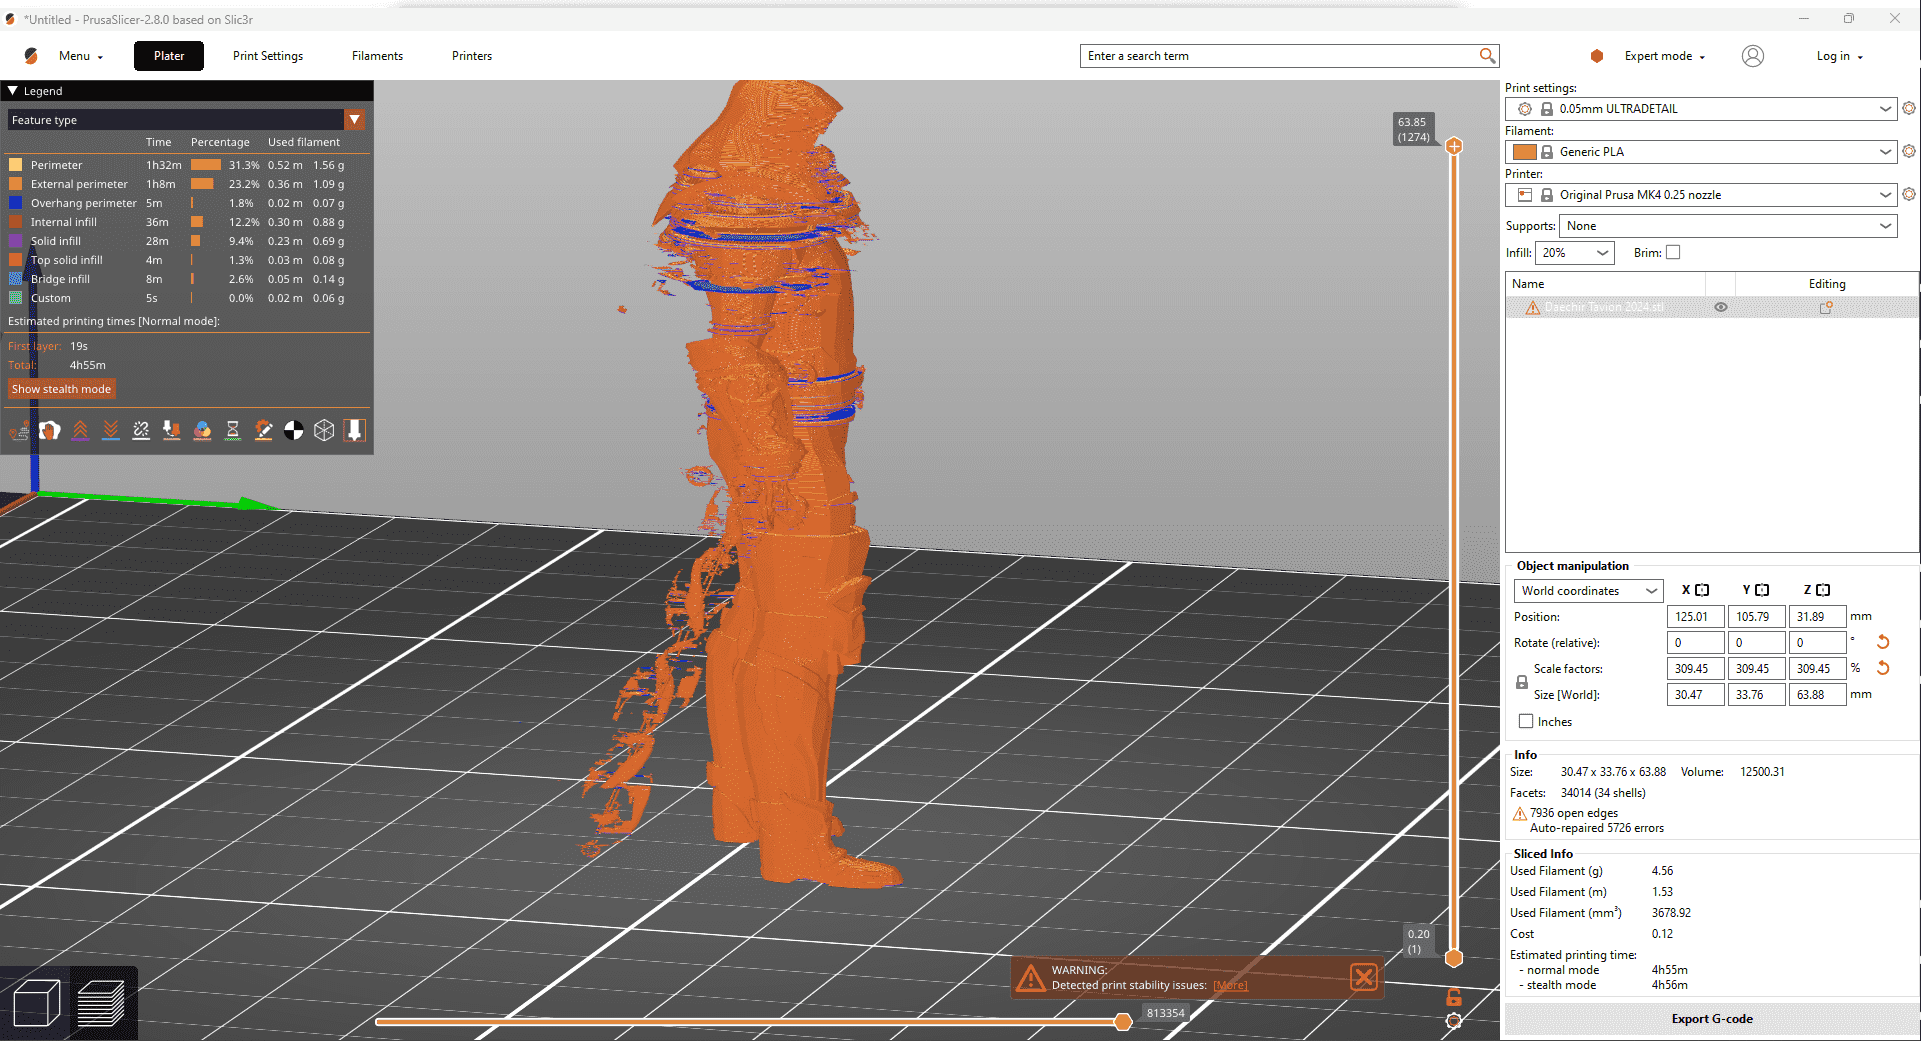
You don't need to know anything about slicers to know that the final print should not look like that. Many parts are of the model are completely or partly gone, the cape, the beard, the weapon... not very pretty. Also note the floating parts. This slice would result in a quite brittle print or a birds nest at best! Well (un)luckily slicing is not the trickiest part of the process, preparing the model to be sliced is!
Going back to Blender...
Some of the meshes contains non-manifold geometry that can not exist in the real world. Since I want to print my character in the real world the geometry needs to be manifold. Common causes of non-manifold geometry:
- Disconnected vertices and edges
- Internal faces
- Areas with no thickness
Most of these issues can be fixed by cleaning up duplicate vertices and adding thickness. In Prusa Slicer all non manifolds are marked in blue: 
Non manifolds can be selected in Blender (Select > Select All by Trait > Non manifold): 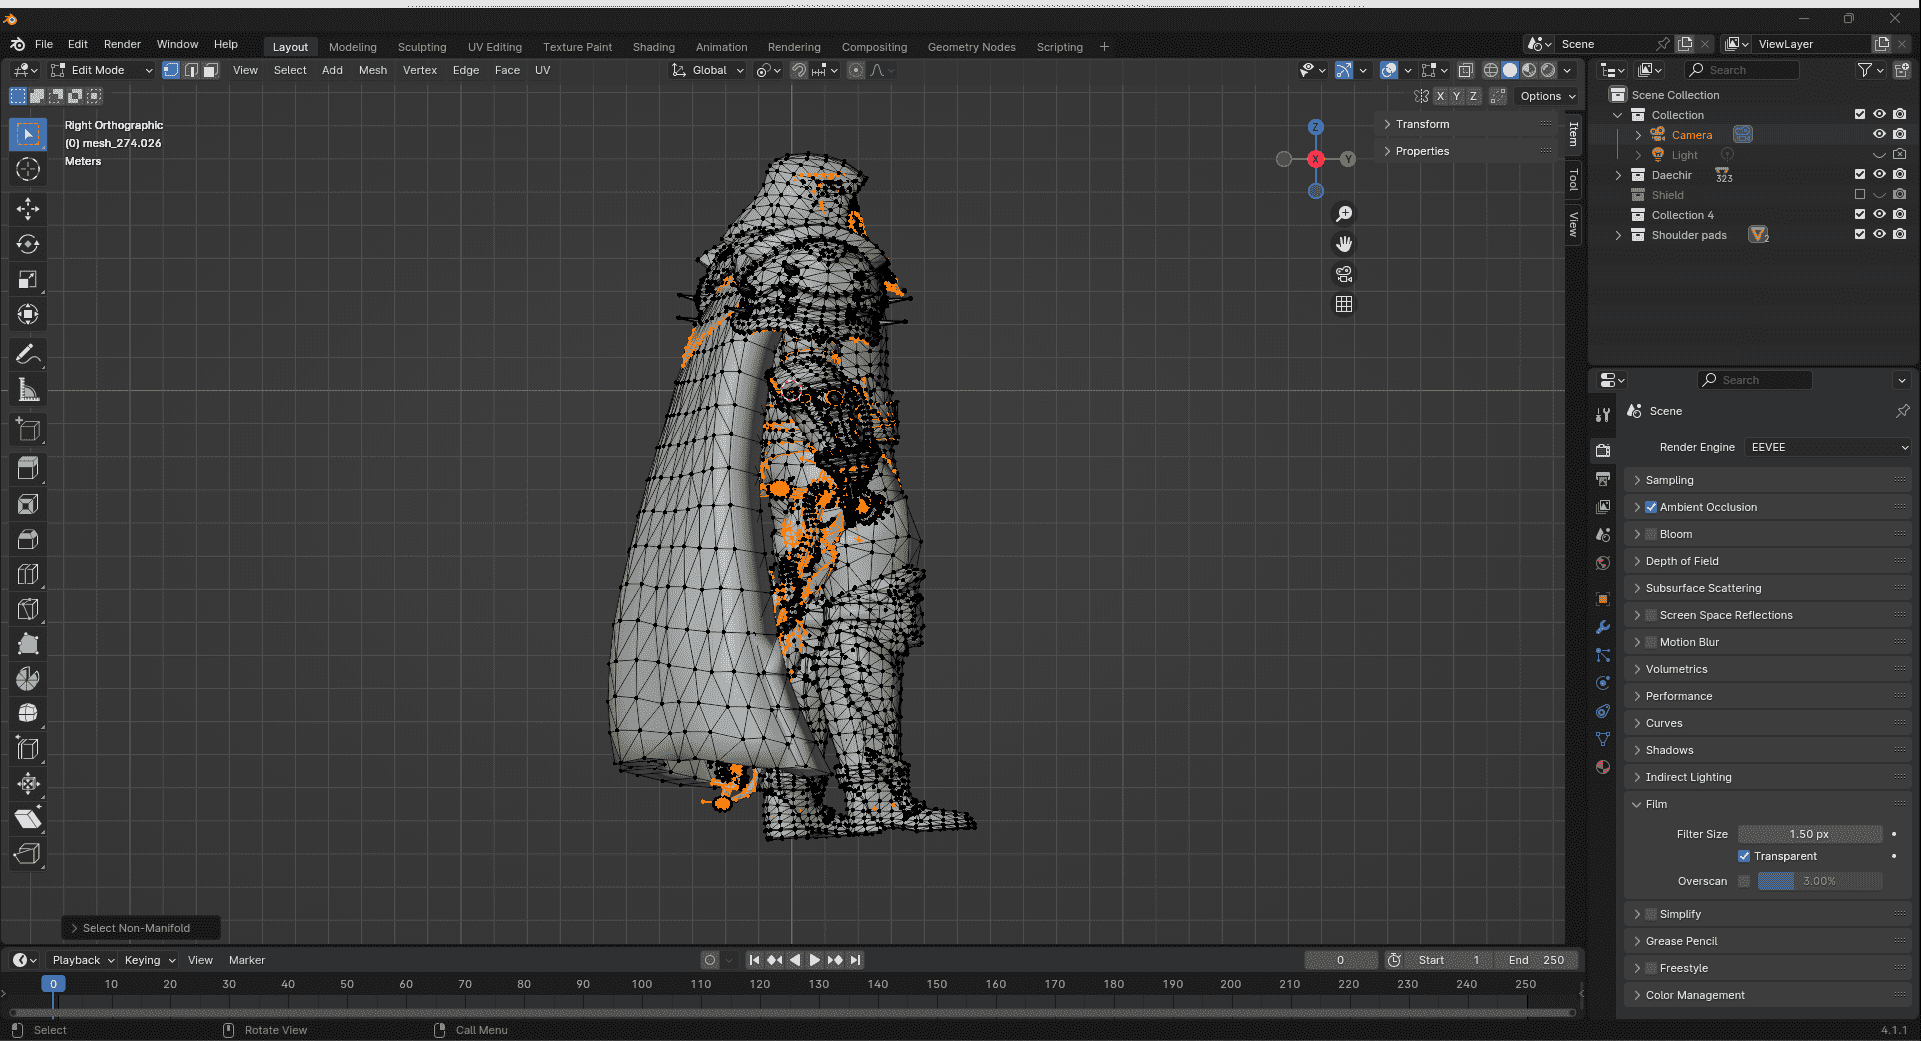
Recalculating normals
Recalculate normals is not needed to be able to 3D print the model. This has no effect to the slice what I've seen, but it helps with rendering else the lightning bounces weird on faulty normals and might result in black spots on the model. Luckily it's (usually) an easy fix, in edit mode select all faces then in dropdown toolbar, Mesh > Normals > Recalculate outside (or just Shift + N)
Before: 
After: 
Fixing areas without thickness
Thickness can be added by extruding vertices, scale, move, and shape or by simply using the solidify modifier. What method to go with depends on the use case.
Adding thickness to the cape.
Before adding thickness: 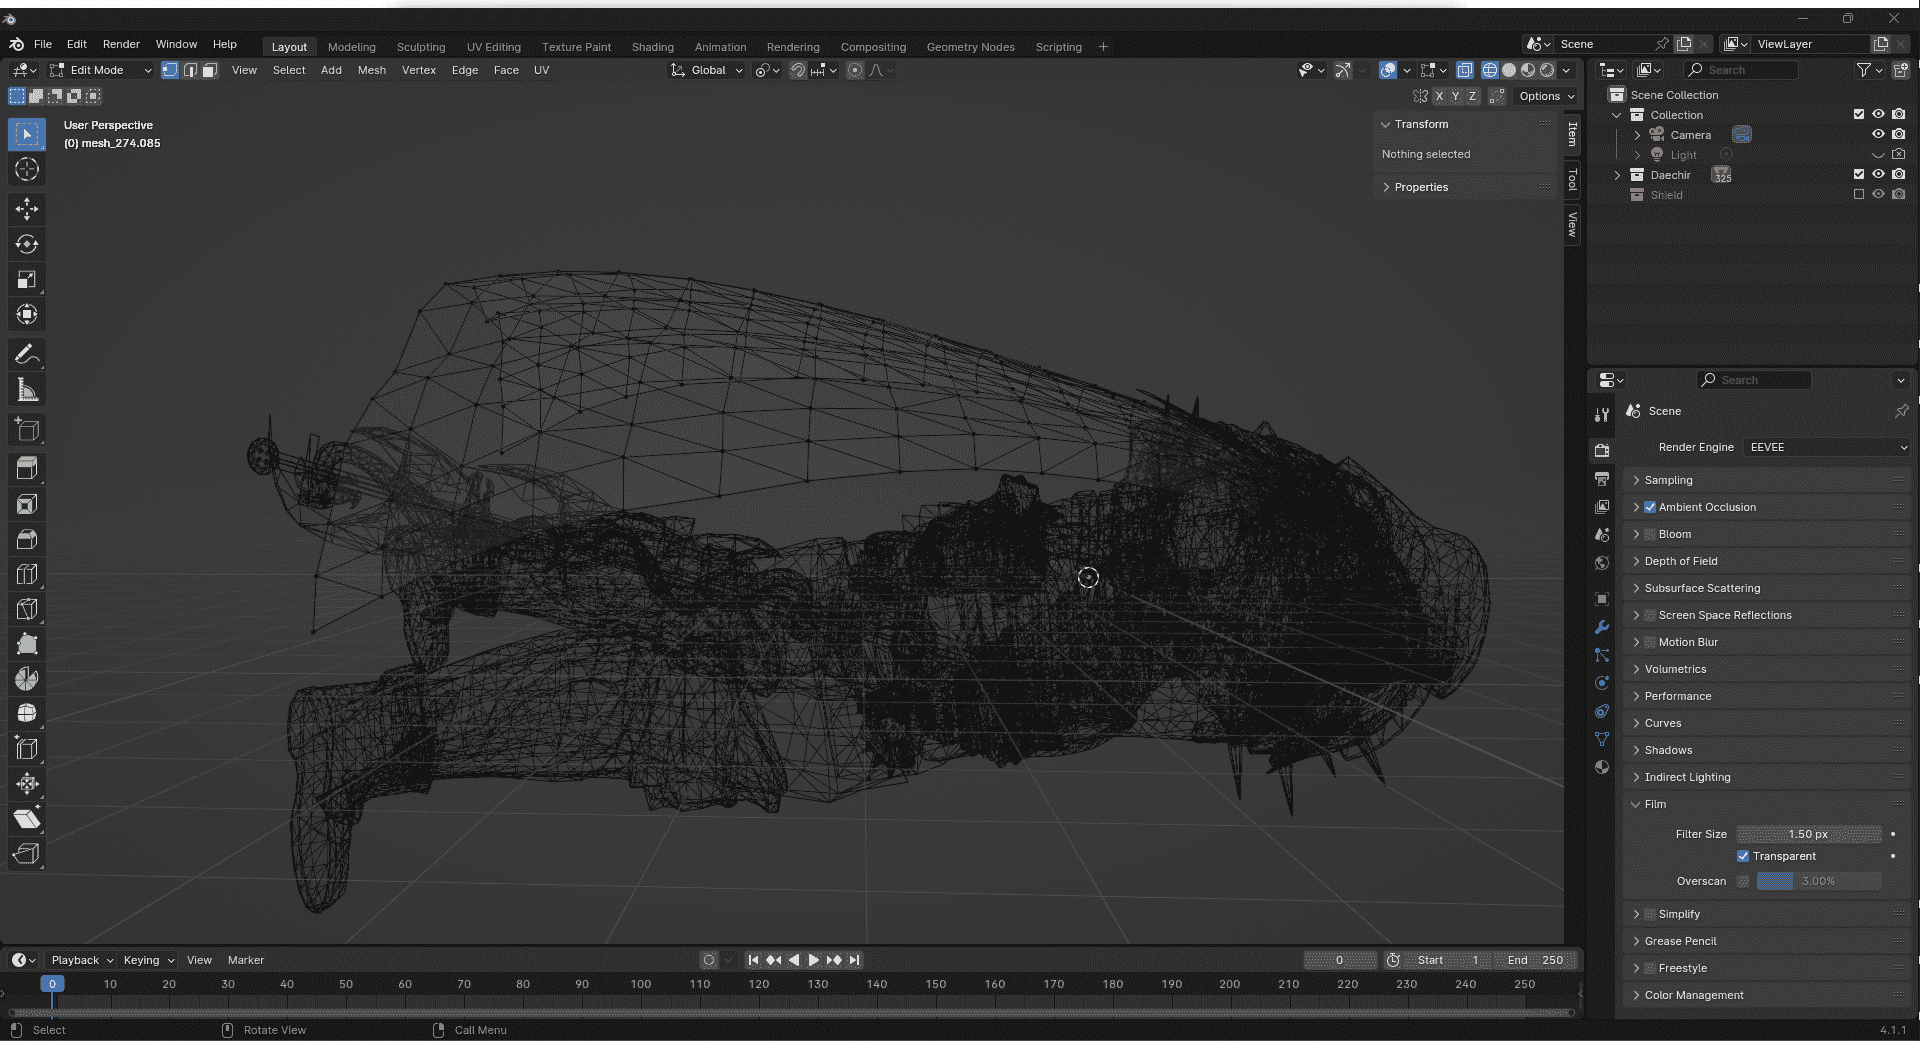
By extending the cape vertices inwards the overall look of the cape is not affected too much.. After adding thickness with the "extrude method" the cape now looks like this: 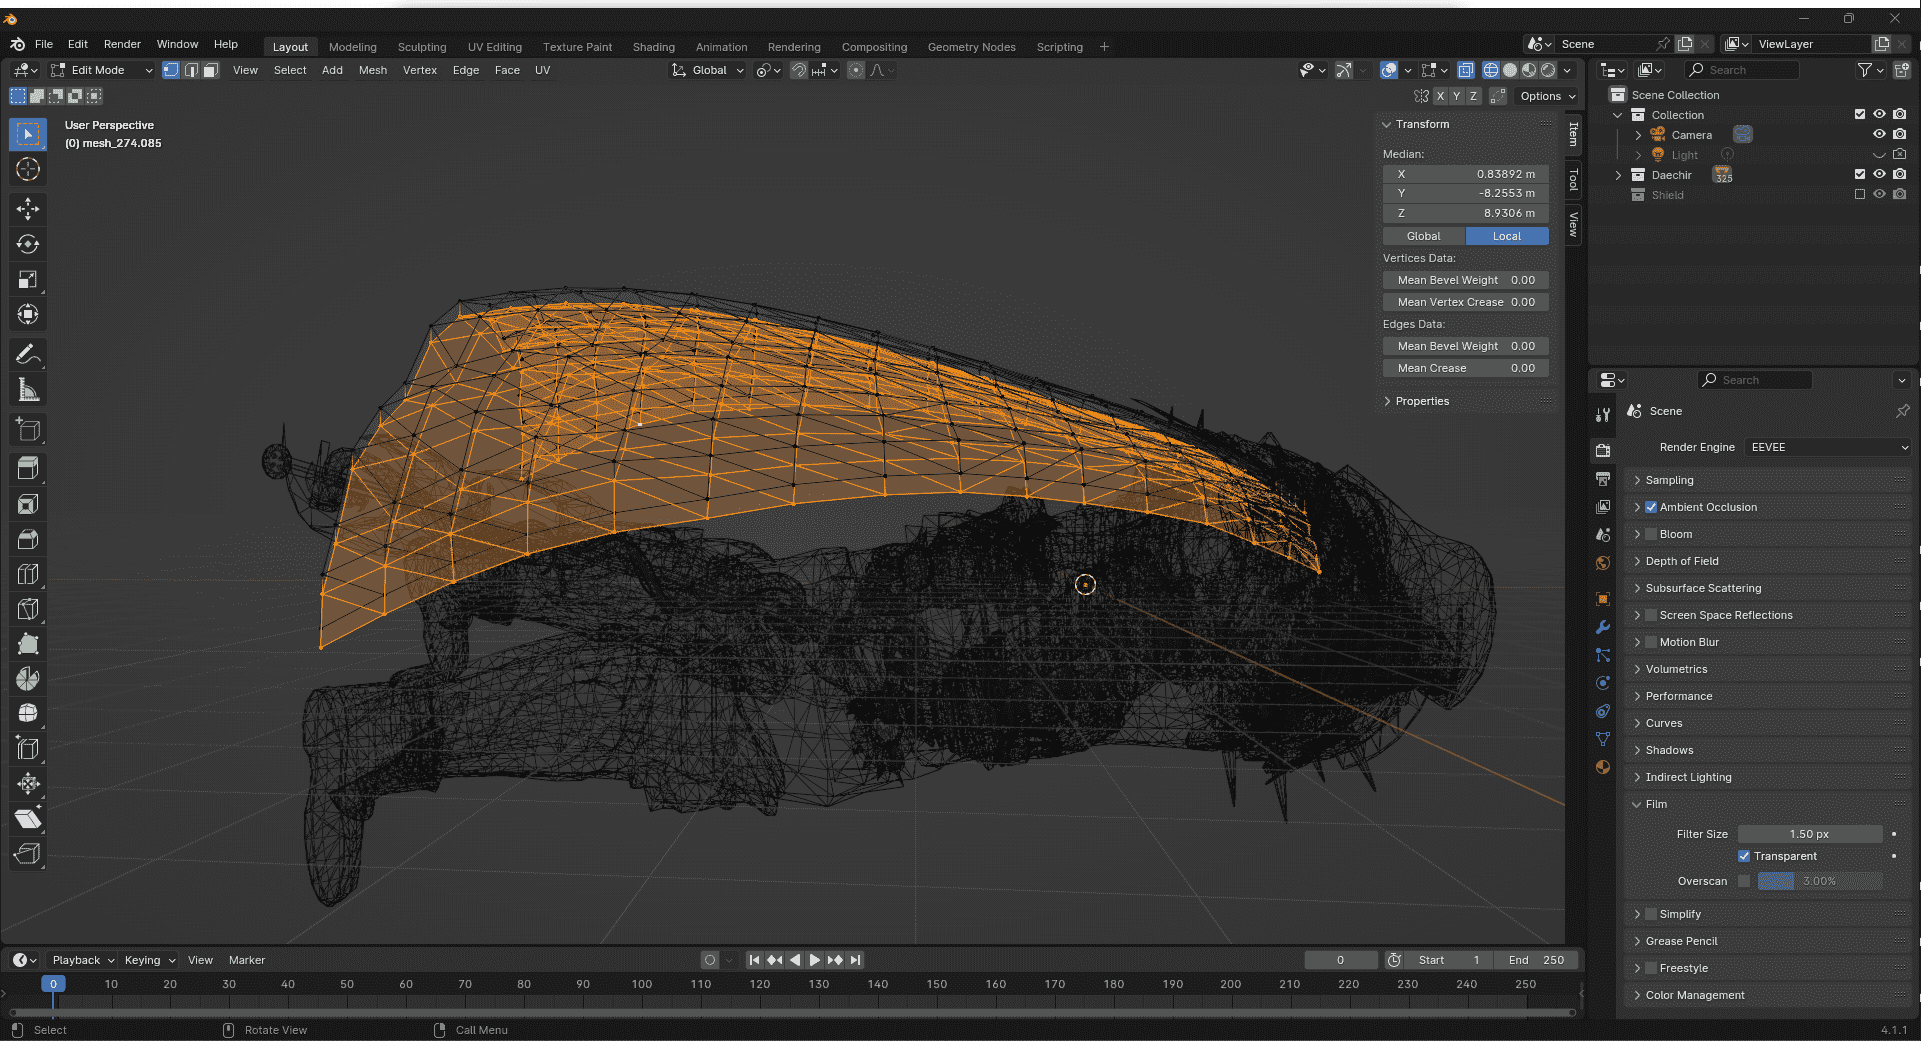
Adding thickness to the beard
The beard, just like the cape, is completely flat without any thickness to it. In-game it is a bunch of planes with textures slapped on. To fix the beard I'm going to use the solidify modifier.
The beard that needs fixing.. 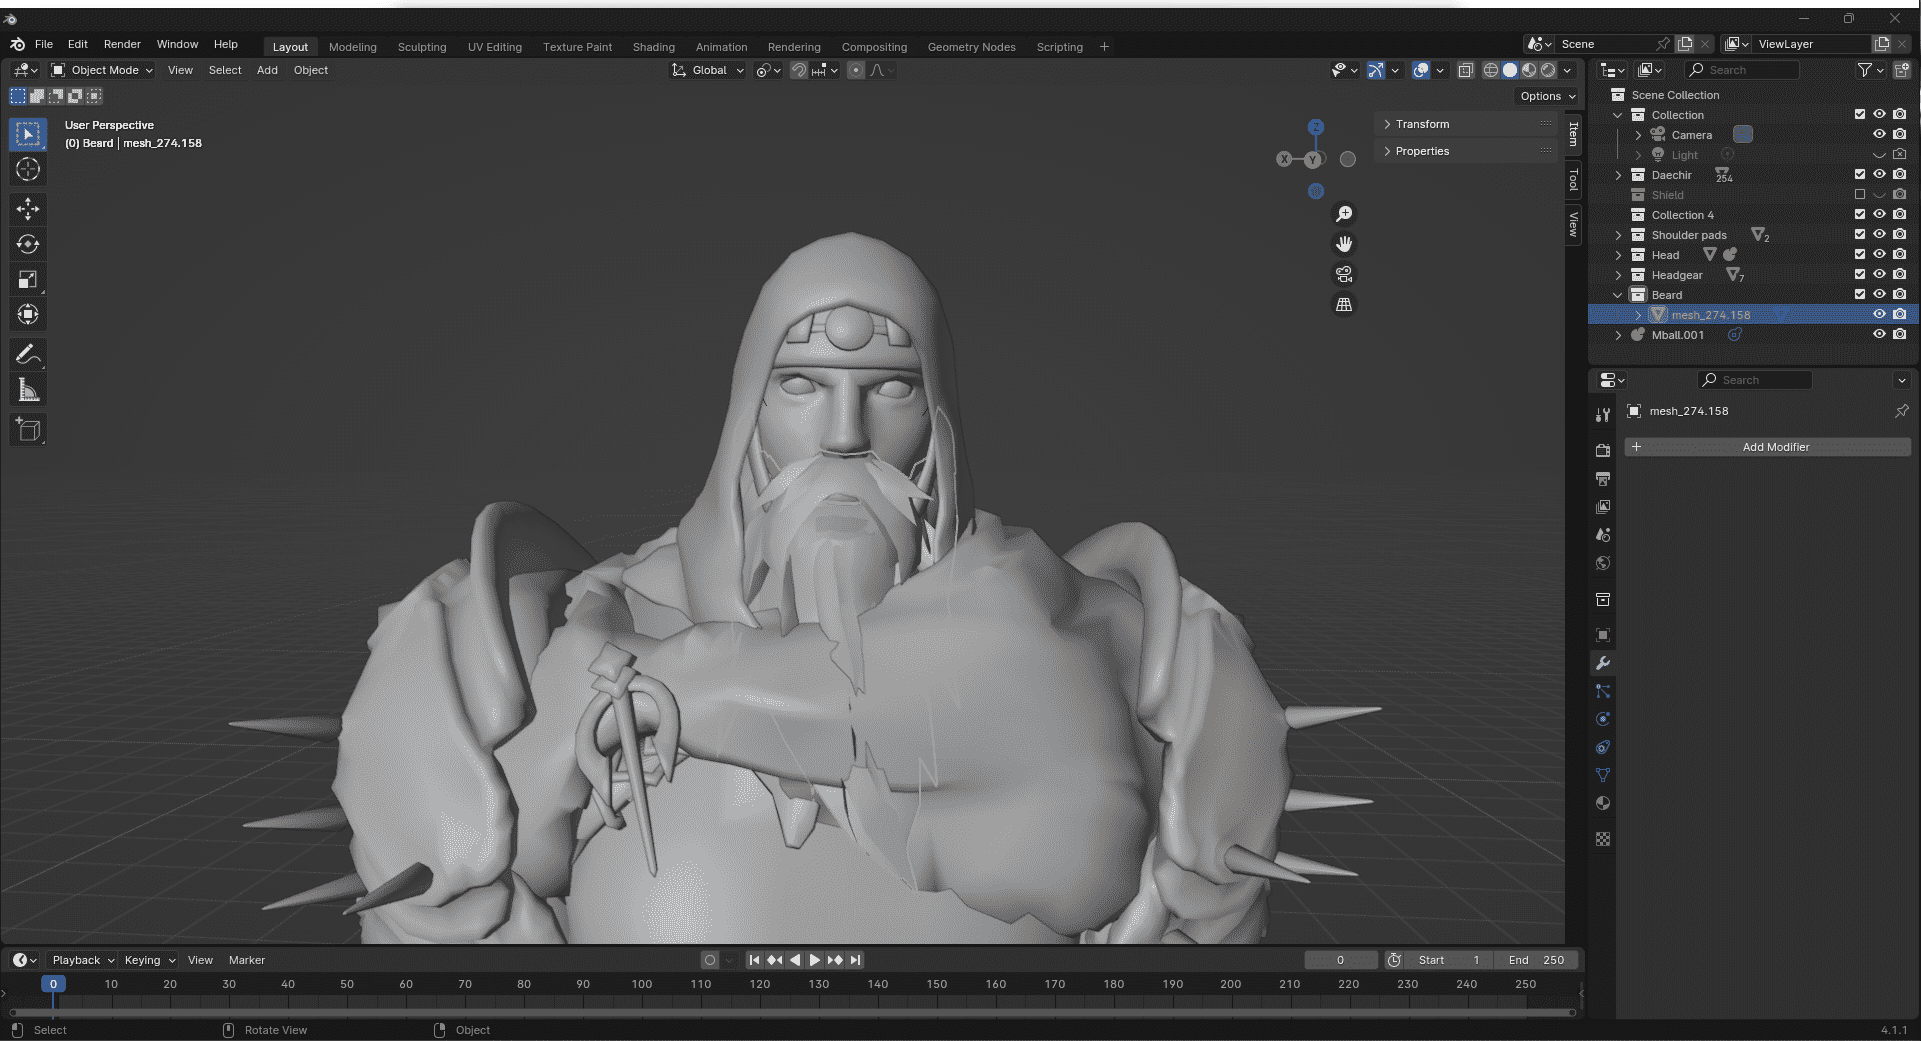
Select beard in object mode > Add modifier > Generate > Solidify: 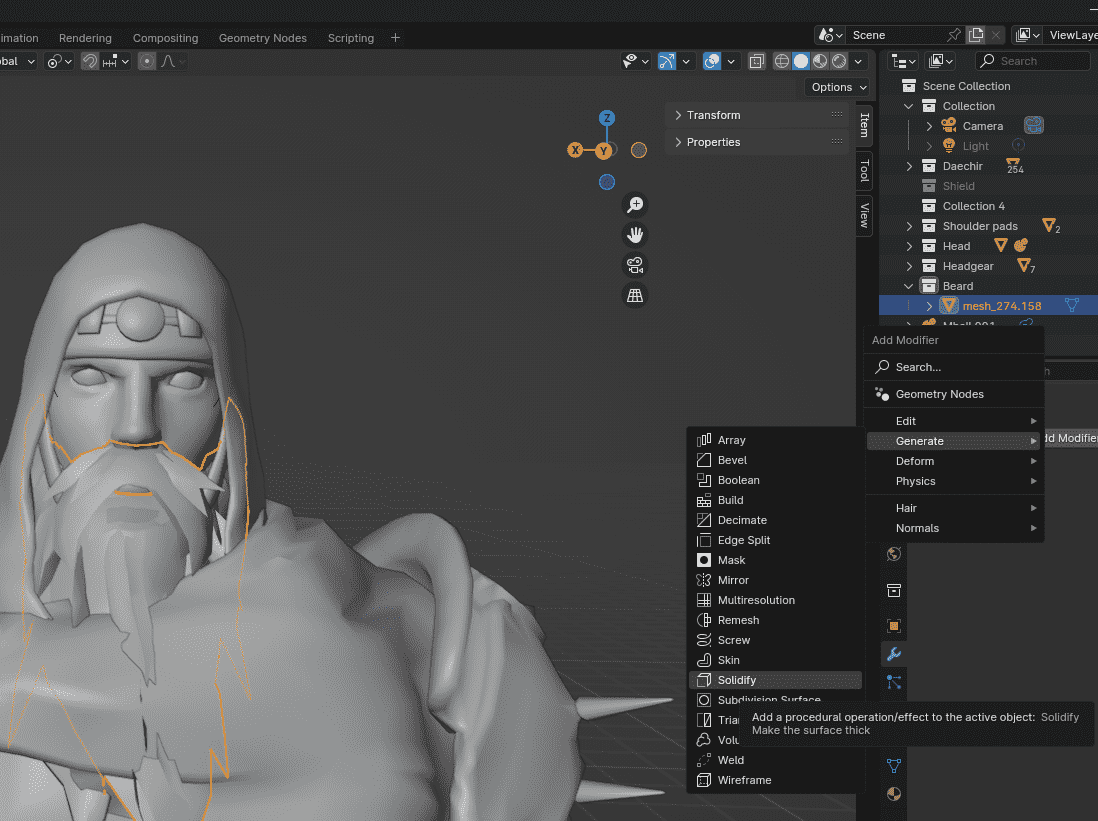 Then adjust the thickness value until you are happy with the results.
Result of the solidified beard: 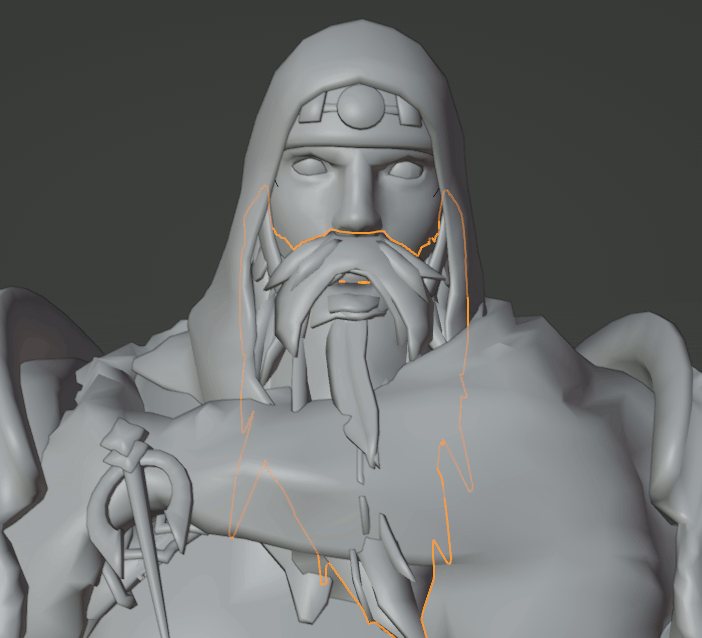
Also, to clean up the model I hid the beard beneath the scarf-y bit: 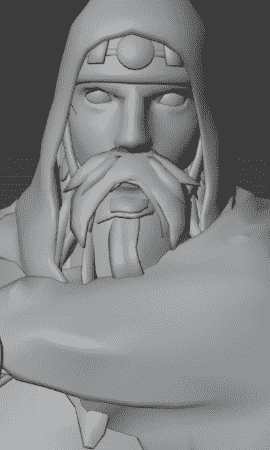
Going back to slicing
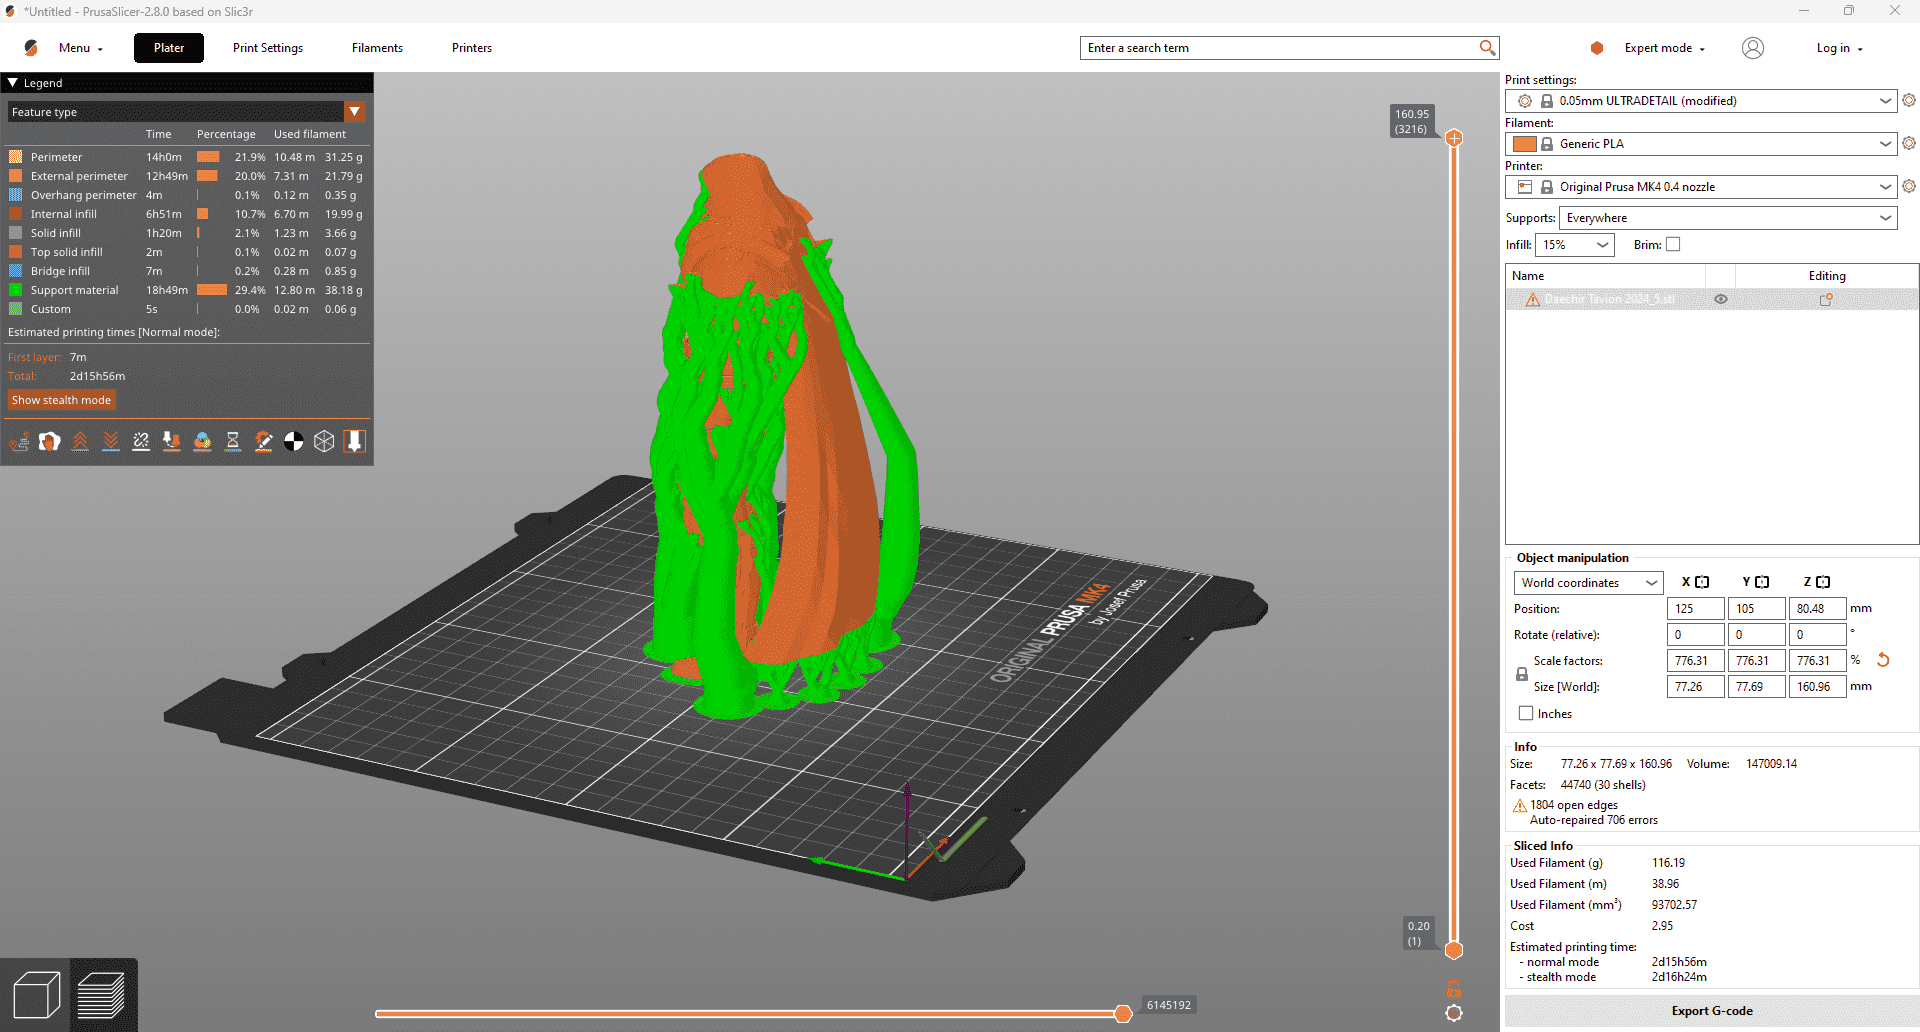
Now in the slicer we can see that there are less non-manifolds. Continue fixing non-manifolds until you are happy with the slice. Not all non-manifolds needs to be fixed to get a decent print.
Go with organic support for faster printing time and easier removal. Some of the character parts are brittle due to its (lack of) thickness.
3D print results!
Here is the final result of the print.
- The shoulder spikes ended up being too thin, so I cut them off.
- Both hands (one hook, one hand) got lose when removing the supports which means I have to glue.
I'm happy with the results. I'm thinking of doing a re-print of the model later but instead of the whole character, I print it as a bust to get more details and for the spikes to be included. Thanks for reading! 